JS4Scratch Reference Manual:
Touching
Touching Sprite
Syntax:

isTouching(sprite)Example:
spriteD.whenFlag(function () {
    this.pointInDirection(180)
    this.goTo(0,150)
    this.show()
    spriteC.show()
    spriteC.goTo(0,0)

    while(true){
        this.ifOnEdgeBounce()
        this.move(10)
        if (this.isTouching(spriteC)) {
            this.say ('touching other sprite')
        } else {
            this.say('not touching other sprite')
        }
    }
})Touching Backdrop Colour
Syntax:

Doesn't work YETExample:
Touching Edge
Syntax:

isTouchingEdge()
// 'bottom', 'top', 'left' or 'right'
Example:
spriteD.whenFlag(function () {
    this.show()
    while(true){
        this.changeY(-2)
        if (this.isTouchingEdge('bottom')) {
            this.say ('touching bottom edge')
            this.wait(1)
            this.goTo(0,0)
        } else {
            this.say('not touching bottom edge')
        }
    }
})Distance To
Distance to mouse-pointer
Syntax:

distanceTo(stage.mouseX, stage.mouseY)Example:
spriteD.whenFlag(function () {
    this.show()
    this.setSize(20)
    while(true){
        this.say(this.distanceTo(stage.mouseX, stage.mouseY))
    }
})Distance to Sprite
Syntax:

distanceTo(spriteD.x, spriteD.y)Example:
spriteA.whenFlag(function () {
    this.show()
    this.setSize(50)
    while(true){
        this.say(this.distanceTo(spriteD.x, spriteD.y))
    }
})

spriteD.whenFlag(function () {
    this.show()
    this.setSize(50)
    while (true){
        this.move(10)
        this.ifOnEdgeBounce()
    }
})Ask & Answer
Syntax:

answer = this.ask('question')Example:
spriteA.whenFlag( function() {
    this.show()
    answer = this.ask('What is your first name?')
    this.sayWait('OK thanks',1)
    this.say (answer)
})Key Pressed?
Syntax:

stage.isKeyPressed('key name')You can use this site to find the key code and key name of your desired key. Either use the key name in quotes eg 'Space' or the keycode instead but without the quotes eg 32.
Common keys are:
| Key Name | Key Code |
| 'Space' | 32 |
| 'ArrowUp' | 38 |
| 'ArrowDown' | 40 |
| 'ArrowLeft' | 37 |
| 'ArrowRight' | 39 |
Example:
spriteA.whenFlag(function () {
   while(true) {
      if (stage.isKeyPressed('ArrowUp')) {
         this.say("Up Arrow key was just pressed")
         this.wait(1)
      } else {
         this.say("waiting for you to press the up arrow key")
      }
   }
})Mouse Down?
Syntax:

(stage.mouseDown) === trueExample:
spriteA.whenFlag(function () {
this.show()
    while (true) {
        if ((stage.mouseDown) === true){
            this.say('mouse down')
        }   else {
            this.say('mouse not down')
            }
    }
})Mouse XY?
Syntax:

stage.mouseX
stage.mouseY
Example:
spriteA.whenFlag(function () {
this.show()
    while (true) {
        console.log('Mouse X:')
        console.log(stage.mouseX)
        console.log()
        console.log('Mouse Y:')
        console.log(stage.mouseY)
        console.log()
        this.wait(1)
    }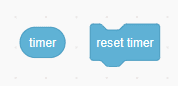
})Timer & Reset Timer
The timer is a variable that needs to be declared in the "Global Variables" TAB as type "Timer". If you need more than one timer just create them for example "timerA" and "timerB" or "GameTimeRemaining" etc. If you don't decare the timer variables then they won't work.
Syntax:
 timer.reset()
 timer.getTime()
Example: note the variable "timer" is declared as a variable with type "timer" in "Global Variables" TAB
spriteD.whenFlag(function () {
    this.show()
    this.sayWait('Game time is 10 sec so countdown from that for time remaining, lets start',2)
    timer.reset()

    while(true){
        this.say(Math.round((10 - timer.getTime())))
    }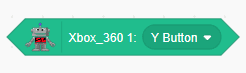
})GamePad Booleans-Digital
xBox & T3
Booleans are variables associated with each input on the GamePad and are either true or false. Booleans are also called digital variables because they only have two discrete values.
Syntax:
scratchLink.gamepad1.input.digital.option
scratchLink.gamepad2.input.digital.option
// inputs - options
lhsJoystick/rhsJoystick - button/up/down/left,right/noInput
dPad - up/down/left/right
a/b/x/y/start/select
bumper - leftTop/leftBottom/rightTop/rightBottom
Example:
spriteA.whenFlag(function(){
    this.show()
    this.sayWait('Make sure that you have a supported GamePad plugged in and connected',2)
    this.say('use the LHS Joystick to move left')
    while (true) {
          if (scratchLink.gamepad1.lhsJoystick.digital.left === true) {
               this.say('true')
               console.log('LHS Joystick pressed is TRUE')
               this.changeX(-10)
               this.wait(0.2)
          } else {
               this.say('false')
               }
    }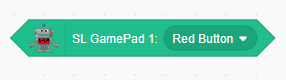
})ScratchLink NunChuck
Booleans are variables associated with each input on the GamePad and are either true or false. Booleans are also called digital variables because they only have two discrete values
Syntax:
scratchLink.gamepad1.input.digital.option
scratchLink.gamepad2.input.digital.option
// inputs - options
nunJoystick/joystick -up/down/left,right/noInput
red/white/black/blue -
bumper - Top/bottom
Example:
spriteA.whenFlag(function(){
    this.show()
    this.sayWait('Make sure that you have a ScratchLink Nunchuck GamePad plugged in and connected',2)
    this.say('use the Nunchuck Joystick to move')
    while (true) {
          if (scratchLink.gamepad1.nunJoystick.digital.left === true) {
               this.say('true')
               console.log('NunChuck Joystick pressed is TRUE')
               this.changeX(-10)
               this.wait(0.2)
          } else {
               this.say('false')
               }
    }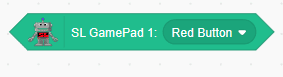
})ScratchLink Classic Controller
Booleans are variables associated with each input on the GamePad and are either true or false. Booleans are also called digital variables because they only have two discrete values.
Syntax:
scratchLink.gamepad1.input.digital.option
scratchLink.gamepad2.input.digital.option
// inputs - options
lhsJoystick/rhsJoystick - button/up/down/left,right/noInput
dPad - up/down/left/right
a/b/x/y/start/select
bumper - leftTop/leftBottom/rightTop/rightBottom
Example:
spriteA.whenFlag(function(){
    this.show()
    this.sayWait('Make sure that you have a ScratchLink Classic Controller GamePad plugged in and connected',2)
    this.say('use the Wii Classic Controller LHS Joystick to move')
    while (true) {
          if (scratchLink.gamepad1.lhsJoystick.digital.left === true) {
               this.say('true')
               console.log('LHS Joystick pressed is TRUE')
               this.changeX(-10)
               this.wait(0.2)
          } else {
               this.say('false')
               }
    }
})GamePad Reporters-Analog
Xbox & T3
Reporters are number value variables associated with each Joystick input on the GamePad but are analog which means that they can be any value (-100 to 100). The Joysticks have four analog reporters being x-axis, y-axis, distance and direction.
Syntax:
scratchLink.gamepad1.input.analog.option
scratchLink.gamepad2.input.analog.option
// inputs - options
lhsJoystick/rhsJoystick - x/y/distance/direction
Example:
spriteA.whenFlag(function(){
    this.show()
    this.sayWait('Make sure that you have a supported GamePad plugged in and connected',2)
    this.say('use the LHS Joystick to point')
    while (true) {
          console.log(scratchLink.gamepad1.lhsJoystick.analog.direction)
          this.pointInDirection(scratchLink.gamepad1.lhsJoystick.analog.direction)
          this.wait(0.1)
    }
})ScratchLink NunChuck
Reporters are number value variables associated with each Joystick input on the GamePad but are analog which means that they can be any value (-100 to 100). The Joysticks have four analog reporters being x-axis, y-axis, distance and direction
Syntax:
scratchLink.gamepad1.input.analog.option
scratchLink.gamepad2.input.analog.option
// inputs - options
nunJoystick/Joystick - x/y/distance/direction
gyro - x/y
Example:
spriteA.whenFlag(function(){
    this.show()
    this.sayWait('Make sure that you have a ScratchLink Nunchuck GamePad plugged in and connected',2)
    this.say('use the NunChuck Joystick to point')
    while (true) {
          console.log(scratchLink.gamepad1.nunJoystick.analog.direction)
          this.pointInDirection(scratchLink.gamepad1.nunJoystick.analog.direction)
          this.wait(0.1)
    }
})ScratchLink Classic Controller
Reporters are number value variables associated with each Joystick input on the GamePad but are analog which means that they can be any value (-100 to 100). The Joysticks have four analog reporters being x-axis, y-axis, distance and direction.
Syntax:
scratchLink.gamepad1.input.analog.option
scratchLink.gamepad2.input.analog.option
// inputs - options
joystick/lhsJoystick/rhsJoystick - x/y/distance/direction
Example:
spriteA.whenFlag(function(){
    this.show()
    this.sayWait('Make sure that you have a ScratchLink Classic Controller GamePad plugged in and connected',2)
    this.say('use the ScratchLink Classic Controller Joystick to point')
    while (true) {
          console.log(scratchLink.gamepad1.lhsJoystick.analog.direction)
          this.pointInDirection(scratchLink.gamepad1.lhsJoystick.analog.direction)
          this.wait(0.1)
    }
})