JS4Scratch Reference Manual:
When Flag
Syntax:
whenFlag(function () {
  /* your code */
})
The whenFlag() event will run the code in the whenFlag() function after the “Flag” is clicked by the user. Note that you don’t have to put your code in a whenFlag() event function, in which case the code will start immediately without any user input.
Example:
spriteA.whenFlag(function () {
   this.say ('Code has started, but I am not in any loop')
})When Key Pressed
Syntax:
whenKeyPressed('key name',function (){
  /* your code */
  }
You can use this site to find the key code and key name of your desired key. Either use the key name in quotes eg 'Space' or the keycode instead but without the quotes eg 32.
Common keys are:
| Key Name | Key Code |
| 'Space' | 32 |
| 'ArrowUp' | 38 |
| 'ArrowDown' | 40 |
| 'ArrowLeft' | 37 |
| 'ArrowRight' | 39 |
Example:
spriteA.whenFlag(function () {
   this.say ('Waiting for you to press the space bar key')

   stage.whenKeyPressed('Space',function (){
      spriteA.say('Well done- you just pressed the space bar')
      stage.wait(1)
      spriteA.say ('Waiting for you to press the space bar key again')
   })
})When This Sprite Clicked
Syntax:
    example_Sprite_sprite.whenClicked(function (){
        /*your code*/
    })
Example:
spriteA.whenFlag(function () {
this.show()
    spriteA.whenClicked(function (){
        this.say('You just clicked me')
    })
})When I receive Message
Syntax:
whenReceiveMessage('message1', (function (){
        /*your code*/
    }))
Example:
stage.whenClicked(function (){
    stage.broadcastMessage('move')
})
spriteA.show()
spriteA.say('click the stage to move me')
spriteA.whenReceiveMessage('move', (function (){
    this.sayWait('You just clicked mouse',1)
    this.move(20)
}))New Message
Syntax:

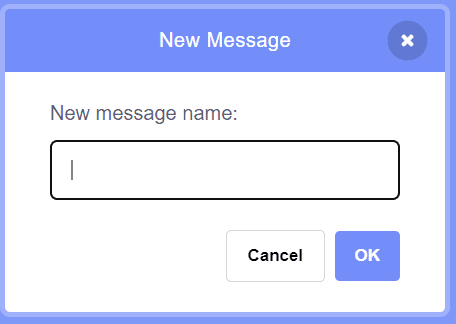
broadcastMessage('message_name')Note that there is no specific "New Message" script, rather you simply broadcast the message directly without having to create a new message first as shown below.
Example:
stage.whenClicked(function (){
    stage.broadcastMessage('move')
})
spriteA.show()
spriteA.say('click the stage to move me')
spriteA.whenReceiveMessage('move', (function (){
    this.sayWait('You just clicked mouse',1)
    this.move(20)
}))Broadcast Message
Syntax:
broadcastMessage('message_name')Example:
// Example: broadcastMessage
stage.whenClicked(function (){
    stage.broadcastMessage('move')
})

example_Sprite_sprite.show()
    example_Sprite_sprite.say('click the stage to move me')
    example_Sprite_sprite.whenReceiveMessage('move', (function (){
        this.sayWait('You just clicked me',1)
        this.move(20)
}))GamePad Events
Xbox & T3
Events are associated with each GamePad input i.e. button, trigger, D-pad and Joystick. Events are used to start a function i.e your own code snippet (see example below).
Syntax:
spriteA.whenFlag(function() {
  eventsGamepad1.addEventListener('input', ()=> {
     // your code
  })
})
// use eventsGamepad1 or eventsGamepad2
input: 'Y Button', 'B Button', 'A Button', 'X Button', 'D-Pad Left', 'D-Pad Right', 'D-Pad Up', 'D-Pad Down', 'Left Top Button', 'Left Bottom Button', 'Right Top Button', 'Right Bottom Button', 'Start', 'Select/Back', 'LHS Joystick Button', 'LHS Joystick Left', 'LHS Joystick Right', 'LHS Joystick Up', 'LHS Joystick Down', 'LHS Joystick No Input', 'RHS Joystick Button', 'RHS Joystick Left', 'RHS Joystick Right', 'RHS Joystick Up', 'RHS Joystick Down', 'RHS Joystick No Input'
Note: events need to be inside a "whenFlag" function and the "arrow function" needs to be used for the event i.e. "()=>" instead of "function()". If you don't use the "arrow function" and you have "this.wait()" then you will get a runtime error in the console. If you don't use "this.wait() then the normal "function()" can be used without issues.
Example:
// Example GamePad Event
spriteA.whenFlag(function(){
    this.show()
    this.sayWait('Make sure that you have a supported GamePad plugged in and     connected',2)
    this.say('use the LHS Joystick to move')

  eventsGamepad1.addEventListener('LHS Joystick Right', ()=> {
       spriteA.changeX(20)
  })
  eventsGamepad1.addEventListener('LHS Joystick Left', ()=> {
       spriteA.changeX(-20)
  })
  eventsGamepad1.addEventListener('LHS Joystick Up', ()=> {
       spriteA.changeY(20)
  })
  eventsGamepad1.addEventListener('LHS Joystick Down', ()=> {
       spriteA.changeY(-20)
  })
})ScratchLink NunChuck
Events are associated with each GamePad input i.e. button, trigger, D-pad and Joystick. Events are used to start a function i.e your own code snippet (see example below).
Syntax:
eventsGamepad1.addEventListener('input', function() {
     // your code
})
// use eventsGamepad1 or eventsGamepad2
input:'Red Button','White Button', 'Black Button', 'Blue Button', 'Joystick Button', 'Joystick Left', 'Joystick Right', 'Joystick Up', 'Joystick Down', 'Joystick No Input', 'Top Button', 'Bottom Button', 'Nun Joystick Left', 'Nun Joystick Right', 'Nun Joystick Up', 'Nun Joystick Down', 'Nun Joystick No Input', 'Gyro Roll Left', 'Gyro Roll Right', 'Gyro Pitch Down', 'Gyro Pitch Up'
Example:
// Example GamePad Event
spriteA.whenFlag(function(){
    this.show()
    this.sayWait('Make sure that you have a ScratchLink Nunchuck GamePad plugged in and connected',2)
    this.say('use the Nunchuck Joystick to move')
})

eventsGamepad1.addEventListener('Nun Joystick Right', function() {
     spriteA.changeX(20)
})
eventsGamepad1.addEventListener('Nun Joystick Left', function() {
     spriteA.changeX(-20)
})
eventsGamepad1.addEventListener('Nun Joystick Up', function() {
     spriteA.changeY(20)
})
eventsGamepad1.addEventListener('Nun Joystick Down', function() {
     spriteA.changeY(-20)
})ScratchLink Classic Controller
Events are associated with each GamePad input i.e. button, trigger, D-pad and Joystick. Events are used to start a function i.e your own code snippet (see example below).
Syntax:
eventsGamepad1.addEventListener('input', function() {
     // your code
})
// use eventsGamepad1 or eventsGamepad2
input: 'Red Button', 'White Button', 'Black Button', 'Blue Button', 'Joystick Button', 'Joystick Left', 'Joystick Right', 'Joystick Up', 'Joystick Down', 'Joystick No Input', 'Y Button', 'B Button', 'A Button', 'X Button', 'D-Pad Left', 'D-Pad Right', 'D-Pad Up', 'D-Pad Down', 'Left Top Button', 'Left Bottom Button', 'Right Top Button', 'Right Bottom Button', 'Start', 'Select', 'Home', 'LHS Joystick Left', 'LHS Joystick Right', 'LHS Joystick Up', 'LHS Joystick Down', 'LHS Joystick No Input', 'RHS Joystick Left', 'RHS Joystick Right', 'RHS Joystick Up', 'RHS Joystick Down', 'RHS Joystick No Input'
Example:
// Example GamePad Event
spriteA.whenFlag(function(){
    this.show()
    this.sayWait('Make sure that you have a ScratchLink Classic Controller GamePad plugged in and connected',2)
    this.say('use the Wii Classic Controller LHS Joystick to move')
})

eventsGamepad1.addEventListener('LHS Joystick Right', function() {
     spriteA.changeX(20)
})
eventsGamepad1.addEventListener('LHS Joystick Left', function() {
     spriteA.changeX(-20)
})
eventsGamepad1.addEventListener('LHS Joystick Up', function() {
     spriteA.changeY(20)
})
eventsGamepad1.addEventListener('LHS Joystick Down', function() {
     spriteA.changeY(-20)
})